How to Start a Fire With Your Bare Hands
Released on 02/26/2020
Fire is one of the most important
and powerful of the primitive technologies.
It unlocked all sorts of potentials
for us on every level.
My name is Bill Schindler.
I'm a professor of archaeology and anthropology
at Washington College and a primitive technologist
and experimental archaeologist.
Fire probably started as some sort
of a natural phenomenon, like a lightning strike.
A forest fire would have drawn our attention,
we would have seen it and probably
started to realize the benefits of fire over time.
We could probably smell the cooked meat
of the animals that were trapped in that fire
and not only died, but were also cooked
as a result of that.
We certainly would have seen the light,
we would have experienced the warmth
and the first sort of harnessing of fire
was probably making sure that that flame didn't go out.
We could take that fire and transport it somewhere else.
Fire requires just three things:
oxygen, fuel and heat.
The oxygen is already present in the air,
the fuel can be any combination
of things that will actually catch flame
and hold that energy it can be wood,
it can be dung, it can be grasses.
What we really need to focus on here is the heat.
How is the heat generated and where does it come from?
Most primitive and ancestral approaches to fire
rely upon friction to generate that heat.
The first thing that you need to do
if you're going to start a fire from scratch
is to make or find a sharp edge.
If you have a knife that's a no brainer,
but if you don't, if you're in a survival situation
you would have to create that sharp edge
by banging two rocks together to produce
the sharp, durable edge and once you have
that sharp edge you can cut the pieces of wood
that you need and most importantly
modify their shape to suit them to make the fire.
The two most common ways of making a primitive fire
are the hand drill and the bow drill.
Let's start with the most basic form
of starting fire, a hand drill
and this is where that saying,
rubbing two sticks together comes from,
but if you just grab two sticks
and rub them together the only warmth
you'd be generating is your muscles moving
for hours on end, you'd never create a fire.
So in order to make a hand drill fire
you need two pieces, you need a hearth board
and you need a spindle that spins inside
of the hearth board.
Both of these pieces need to be bone dry
and made out of the right materials.
The hearth board needs to be made out of something
that's not resinous, so it can't be from a conifer,
it can't be hemlock or pine or spruce
and it also has to be from a wood that's somewhat soft.
My test for finding out whether or not
this wood is the right type is to actually
put my finger nail in it and see if it leaves a dent behind
if it does it's probably the right material.
Here in the Eastern Woodlands I use wood
from trees like basswood or tulip poplar
or cedar they're absolutely ideal.
The spindle needs to not only be dry,
but it needs to be straight and it
also needs to be somewhat soft.
Quick growing plants like cattail
or horseweed or mulin or even goldenrod work perfect.
On materials like this horseweed
that have all these little knobs,
these knobs are going to tear your hands up
and they need to be removed,
so if you take your stone tool
and hold it perpendicular you can scrape them off
and make it smooth.
Once you've prepared the outside
of the spindle and cut it to length
you have to pay attention to the very end.
This end, the larger end is gonna sit inside
the hearth board, inside the notch you create
and you have to make sure
that it is a very clean cut.
These little frayed pieces are gonna disrupt
the dust pile that you're spending
all this time creating, it's gonna disperse it
and you're not gonna be able to start a fire.
If it's not, take that stone tool
hold it perpendicular and very gently scrape the edge.
Once you've prepared your spindle
the single most important thing
that you have to remember is not to put it down
on the ground, even if you think the ground is dry
it's not and if any moisture gets to the end of it
it's gonna be a failed attempt at making a fire.
So once it's prepared set it aside
somewhere that it's gonna stay dry.
The next thing that you need to do now
is prepare your hearth board.
Your hearth board can be split
out of the proper size stick.
I can split the end, I can carve it down,
but what I'm really looking for
when I'm ready to go is something
that's about a quarter inch or 3/8 of an inch thick.
It needs to be flat on the bottom,
so it can sit there without rocking.
So if you start with a round stick like this
it can be split on both sides
or it can be carved down in order
to achieve those flat surfaces.
After you've achieved that flat surface
we need to create a divot in which
the spindle's gonna sit and spin without hopping out.
The last thing you want to do is spend all your time
and effort so close to making a coal
and then the spindle pops out
and the entire thing has failed
and you have to start all over again.
So I'm gonna pick up this flake that I made
and I'm gonna use it to create that divot.
The nice thing about these stone flakes
is that they have all different surfaces on 'em,
but I can start the divot with this part
and I can widen it with this part.
What I'm gonna do here is not actually
do anything to start the fire, I'm gonna actually
use this spindle for a moment like a drill.
I want to drill into that hole
to ensure that it's seated and it's not gonna pop anywhere.
So very slowly, very deliberately
with some downward force I want to use
this spindle like a drill.
I've created the divot that I need
for this spindle, but you'll notice
I'm also creating the dust that's accumulating
around the outside of this hole.
That dust will never ignite if it's distributed
around the outside of that whole like that.
I need to create a notch where all that dust
will fall in and make one single, solid, powerful hole.
In order to do that I'm gonna take my stone
and carve the notch and what I'm looking for
is just like this one here, it's gonna look like
a slice of pie or a slice of pizza
and the center of that notch should be aiming
for the center of that hole and it should broaden out
on an angle of about 30 degrees or so
by the time it reaches the edge of the wood.
Your final motion after you're creating that notch
should always be downward because you don't want
any of those little fibers of the wood
sticking up, it's gonna disrupt your ability
to form that really nice bundle.
The next thing that I need to do
will determine the success or failure of this fire.
I need to make sure everything
that I need after a coal is created
is at my disposal in the right place.
So the first thing that we need
is a tinder bundle that's gonna take that coal
that burning ember and blow it into a flame.
I love to use cedar bark, the inner bark
of the cedar tree is perfect for this application.
This is what it looks like when I pull it off the tree
and in order to turn it into a tinder bundle
I need to make sure that I increase the surface area,
so that I can allow it to ignite
at a lower temperature and air to come through.
So you can take it and move it like this,
I'm breaking up and separating those fibers.
I need to split the difference between
separating this and allowing a lot of air to get through
and making sure that there's not a big hole
in which the ember will fall through.
Something around like this is perfect
and just like with all my other materials
I don't want to set this on the damp ground.
Once it's done I'm gonna scoop up
anything that's fallen and stick it right back in.
Okay, I'm gonna start this fire
right here in front of me, it has been raining
for four days straight.
This is actually the worst conditions
in which to try to start a hand drill fire.
However, you know one of the things
that I do need to worry about,
which is not as big of an issue now
is the potential for this fire to spread,
but I'm still gonna clear away some of these leaves,
you know I want to get right down
to the bare, mineral soil.
The other thing I need to do before
I even attempt to make my hand drill fire
is to get all of my wood ready,
so what I want to do is take this wood
and sort the size of it and I'll start with the smallest
and go to the biggest.
Starting a hand drill fire in the woods
is an incredibly difficult thing to do,
it requires a lot of skill and a lot of energy.
If you get to the point where you actually get a coal
the last thing you want to do is compromise
your ability to make a fire
by not having all your materials ready.
It is worth the effort to spend five minutes
doing this to your wood.
Okay, I have my wood ready the final two pieces
that I need now that I have everything prepared
in front of me is something to catch the ember.
This piece of birch bark works great
I could use a very dry leaf, a small piece of wood
and I'm gonna use this to put right under
that notch that I created and it's gonna collect the dust.
Once that dust is collected and it turns
into an ember I can take that and pick it up
and very easily transfer it into by tinder bundle.
The final thing that I need is to have
a little piece of a stick ready
because that ember, that dust is gonna work
almost like glue and it's gonna want to stick
to my hearth board and I'm gonna use
this little stick to hold that ember in place
as I remove the hearth board, so I don't disturb it.
You need to make sure that this hearth board
doesn't move, one thing we've done to accomplish that
is we flattened the bottom of the hearth board.
The second thing that we could do
is hold down the sides of it.
If there's somebody else with you
have them hold it, if there's not
you're gonna have to hold it with your foot
or you could take stick like this and kneel on it.
The spindle goes in place and you have to lick your hands
especially on a cold day like this,
my hands actually have to grip this spindle
and the spindle has to move
and you start nice and gentle.
Things to look for:
Make sure that the spindle bottom
isn't popping out of the hole.
Make sure that there's nothing
that's interfering with your hands,
if you feel like your hands are starting to get
a little bit dry, stop right now
and make sure you lick 'em again.
I want to make sure that I'm drying out that board,
starting to heat it up, starting to generate
the dust and I can do that by moving very, very slowly.
The other thing I need to make sure
that I'm doing is using my entire hand,
every time that I spin my hands
I'm rotating this spindle and it's generating heat and dust,
as soon as I stop it cools down
and I go back the other way.
If I use my entire hand fingertip to palm
I'm getting more rotations before it cools down.
The other thing you'll notice is if
you're generating downward pressure,
which you should be you're hands are slowly
gonna move down the shaft, when you get to the bottom
you're gonna stop, hold it with one hand,
continue to exert downward pressure,
grab the top with the other
continue to exert downward pressure
and reposition your hands to the top and continue again.
This may take more than one go,
but I would love to get it all in one,
so that would be awesome.
Son of a [beep] spindle broke.
Let me try this way out.
So you don't want this hearth board to move,
so the easiest way to do that is with the side of your foot.
All right so it's cold, it's damp
my hands are dry though and I'm tired
from trying to do this the best thing
that I can do right now is take a quick break.
I'm gonna take off this shirt.
This is much better to show
and my hands are doing the entire...
I got it.
Okay, we have the coal.
We have to use this stick keep the coal intact
and we're gonna let this coal grow.
The more this coal grows the stronger it gets
and I'm gonna need all that strength
to transfer this really weak coal
into this tinder bundle.
My job is to keep it in one place,
in one ball if possible when I transfer it.
I'm blowing very gently to provide the oxygen.
I'm holding it on the bottom because
the flames are gonna go up.
And we have flame.
I'll put this on the ground.
I do not have a fire yet all I have is a flame.
I'm gonna take my smallest pieces of wood
and lay them on top.
Laying these sticks on top naturally form a teepee
that's the shape it takes.
We're starting to get some of the smaller stuff lit.
Right here the energy in that system is building,
it's gone from tinder to something bigger,
which means it's getting stronger
and slowly I'm gonna build the size of the sticks up.
Then I'm done, that's all I need to do.
A bow drill is sort of a hand drill on steroids
and a bow drill fire requires both a hearth board
and a spindle, but it also requires
a bow which instead of your hands is used
to spin the spindle.
The advantage to that is that when you're
using your hands to generate the heat,
to spin the spindle you only have
the length of your hand to spin it
until it stops for a moment and goes the other way
and that pause for that split second
allows this system to cool down.
So if you can extend that distance
that you spin that spindle without having to stop
and reverse the direction, it's an incredible advantage.
So if you take a bow, which is essentially
a stick with a string on it
and wrap it around that spindle
you have the entire length of that string
to go in one direction without having to stop
and move in the other direction.
The other part of the bow drill,
which provides an advantage is a handpiece
and that handpiece sits on top
of the spindle and provides the downward pressure,
so immediately by adding the bow
and the handhold you're increasing the speed,
you're increasing the amount of rotations
before you stop and let it cool down
and reverse direction and you're increasing the pressure.
It's a lot easier to make that fire
and a lot quicker often to make that fire.
So to make a bow drill you need to make a bow,
this curved piece of wood works great,
but you can actually use almost any piece of wood
as long as you attach the spindle on the right way
so it's on the outside of the string
even a straight piece of wood will work fine.
But what you really need to do
to make this successful is make a string
that wraps around the spindle
and there's a number of different ways to do this,
if you're in a survival situation
and you're wearing shoes or boots with laces
you can obviously use the laces,
but other options include things like
natural plant fibers like this dogbane here,
which produces incredible fibers.
You can extract these fibers and twist those fibers
into a really strong piece of cordage.
The problem is there's so much pressure
and friction on this entire system
that the natural vegetable fibers
wear out rather quickly.
My favorite way to make a bow drill string
is actually to use rawhide or to use leather,
this is a piece of brain-tanned deerskin
and I'm gonna show you how to quickly make a string
that'll not only make this fire successful,
but you can use for successful fires into the future.
I can take this razor-sharp flake
and use it to cut this piece of leather
in a spiral pattern and I can make
a really long string out of it.
I'm gonna fold it over itself and I'm gonna
make a two ply cordage out of it,
which is gonna more than double it's strength,
it's also gonna make this string more round
which is gonna make it more successful for me
and it's also gonna make a loop on the end
which will allow me to attach it very easily to the bow,
so this is gonna be a two-ply cordage
and in fact this is the way that all ropes used to be made.
I twist in opposite directions
just like this and twist until it kinks on itself
and I'm gonna hold that end.
All that I'm doing is I'm taking
both of these twisting them in the same direction
and then twisting them back around one another
in the opposite direction and it's gonna hold it tight
and I'm gonna go right down the line.
Twist and reverse, twist and reverse.
Here's the completed piece of cordage
and what I'm able to do is use that loop
and send it right through and I'm gonna stick this
right on the end of my bow.
I've made a small little notch here that'll catch it.
I'm gonna pull that down to this other notch
give it a little bit of slack,
so it'll wrap around the spindle,
wrap it around a few times.
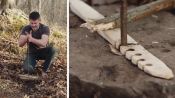
This is my completed bow and string.
This is the spindle that I use
for the bow drill fire, it's shorter
than the hand drill spindle and it's also bigger around.
This end needs to be pointed, this is the end that's up
and fits in the handpiece, if this is pointed
there's less surface contact and there's less energy loss
and I can shape that again with this rock.
The bottom end needs to be flat or as flat as possible.
The reason I'm making it flat is because
I want that broad flat surface
against the broad flat surface
of the hearth board and there's more surface area,
there's more contact, there's more friction
and there's more heat.
The only other piece of the bow drill set
that you need is the handle,
this handle needs to be as frictionless as possible,
which means it should be made out of a hard material.
It can be made out of a strong,
hard piece of wood like this osage orange,
it can be made out of a shell,
a hard bone or even a rock that had a divot in it.
So I need to create this divot
inside of this handpiece so it can accept
the far end of the spindle.
If I'm making this on a rock I can take another rock
and peck the hole into it.
If I'm making it on this piece of wood
I can use my flake and twist it just like this
to create this hole.
Now I'm gonna make that coal with a bow drill.
The similarities between a hand drill
and a bow drill are that they both have a hearth board
and they both have a spindle,
but the difference is that I'm gonna exert
my pressure using a handhold on top of the spindle
and I'm gonna rotate that spindle using a bow
instead of just my hands.
The advantage here is that that spindle
can travel the entire length of the string
of the bow without stopping and cooling down
as it reverses direction.
The advantage to the handhold is that
I can exert a lot more pressure
and I can use a lot shorter spindle.
Positioning here is really important
the first thing I'm gonna do just like
with the hand drill is put something
underneath the hearth board to catch the ember.
The second thing I'm gonna do is position my body
so everything's locked in place
and nothing is moving around
and I'm gonna take my left hand.
Which is the hand that's holding the top of the spindle
and lock it in around this knee and into my shin
and just like with the hand drill
when I move this bow I also want to
reduce the friction on the string,
so you see if I tilt this bow a little bit
it separates those strings and if I do that
that means they're not rubbing against each other
and my string is gonna last a lot longer.
So I tilt it down just a little bit,
but I'm still moving my right hand parallel to the ground.
Start out nice and slow, but all of a sudden
you can see there's smoke faster
than there was with the hand drill.
Okay, I need to stop now and remove something
because what happened is that it's slipping out
because there's this split in the wood,
so I'm gonna take two seconds
and I'm gonna make another notch real quick,
so that my spindle doesn't pop out.
You see there's smoke coming
from the dust pile so I'm gonna take this stick,
put it into the back, hold the ember in place
and remove the hearth board.
This ember is what I'm gonna use
to transfer to my tinder bundle
and then blow that into a flame and there's my coal.
The way you build your fire is largely influenced
by what you're trying to accomplish.
If you want light or heat my go to fire
is a by default teepee fire,
if you take a burning tinder bundle
put it on the ground and slowly begin
to lay increasing sizes of wood on top of it
it naturally forms a teepee.
If you want a fire for light you want large flames,
you have wood that is organized in such a way
that there's a lot of air between it
and a lot of air between that wood
allows for not only introduction
of a lot of oxygen, but there's a lot of
individual pieces of wood that are acting
like individual pieces of wood
and they're all burning up extremely quickly
and that's generating a lot of heat
and a lot of light, it's not generating a lot of coals.
In most situations when you want a fire for cooking
you want a good bed of coals.
I've found the best way to build a fire
to cook with is using the parallel log method.
This method is something I learned
while living with the hods in Tanzania,
what they explained to me this accomplished
was it created a bed of coals in the quickest way possible.
So they would start off the same way
they'd begin to start the fire,
they'd lay sticks on top of it,
it would superficially look like a teepee
until it got going and then they'd lay
all their logs down on top of one another
in a parallel fashion and they oriented
the direction of the logs with the direction of the wind,
so the winds coming up through the middle.
You can only do this once you've already
built up enough coals to rearrange the fire.
This is an ideal fire lay to build up
the largest bed of coals as quickly as possible
and the reason is because I've actually
closed down that air gap.
I'm laying these logs in close enough,
so close that instead of burning up in huge flames
they actually burn a little bit more slowly
and produce those coals, but I do have
just enough of an air gap and allow the wind
to blow through between these that it's staying lit.
I've built up this incredible bed of coals
in no time using the parallel fire method.
In order to cook on this fire
I need to spread these coals out,
gets a nice hot bed of coals and in this spot
over here I'm gonna put the meat
directly on top of the coals.
Okay, so the meats done.
Even though you may never find yourself
in a survival situation I firmly believe
that learning and practicing these primitive skills
are an essential part of connecting
with your past, your environment
and everything that it means to be human.

How to Forage and Cook Wild Plants

How to Make Stone Tools
How to Start a Fire With Your Bare Hands

EY's AI Evolution: Empowering People and Businesses

Music & Tech: Striking a Chord

How US-UK Collaborations Take Tech Further

Powering Innovation

How Scammers Actually Work—And How To Avoid Them

Cybersecurity Answers

Yuval Noah Harari Sees the Future of Humanity, AI, and Information